
Summer is almost upon us and it’s time to learn some cute styles for the hot weather season! Our guest Clare is showing us 3 today!
 We’ve been following this blogger for awhile now and have loved seeing each new hairstyle she comes up with. Huge thanks to Clare @Seton Girls’ Hairstyles for these beautiful DIY hairstyles! 😍 Doesn’t she make them look so easy?!!
Make sure to check out her blog for SO many more great tutorials!
Clare: Hey everyone! I’m Clare from the website Seton Girls’ Hairstyles!
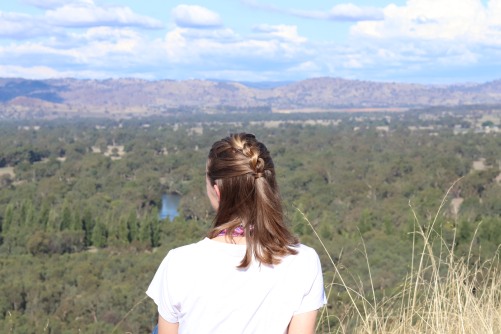
Anna asked if I could share some summer hairstyles with you today, which is honestly kind of ironic for me at the moment because we’re just heading into winter where I live in Australia. 😀
I’ve got a fun selection of hairstyles to show you today–I hope you like them!
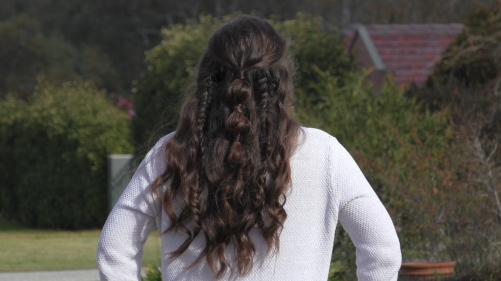
Hairstyle No. 1: DIY Boho Bubble Braid Combo
I came up with this hairstyle a couple of years ago, and just love how cute and different it is. It’s also perfect for summer, because you get those boho vibes! It’s also a huge help if you have a mirror so you can see the back of your hair if you’re doing this style on yourself.
Items needed: 5 or more small rubber hairties, a tospy tail tool (You can find them at most dollar stores, and other places which sell hair accessories. (; )
Time: 10-18 minutes (just because the braids are small and a little time consuming. This also depends on your hair length. 😉 )
Skill Level: Medium
Step by step instructions:
1.) Start by sectioning off some hair at the top of your head. (You can pull all the hair straight back or leave it parted.) Hide the elastic by wrapping some hair around it, and pin the end to secure it in place. You can also use the topsy tail trick which I will explain down below. (I find this trick keeps the hair more secure than with a pin.)

2.) Next, you are going to move down your tie back about an inch or so, and secure it off with another elastic to create a bubble. After securing the hair, you’ll want to tug on the bubble to create a puffier look.

3.) Now to do the topsy tail hair wrap trick. Insert the pointy end of the topsy tail straight down into the middle of the tied section (not behind it.) Then pick up a small section of hair from the back of your tied-back section, and wrap it around the elastic a few times before poking it through the loop of the topsy tail. Hold the end of the hair through the loop with one hand and use the other to pull the pointy end of the topsy tail down through the hair tie.

4.) Repeat steps 2-3 until you are close to the ends of your hair. (I did three bubble sections before stopping.)
You could leave the hairstyle as is at this point, or continue with the rest of the steps to give it a more boho look.

5.) Next, you are going to do a reverse fishtail braid on each side of the bubble braid. (For a reverse fishtail, you take the sections behind when braiding, instead of in front.) If you don’t know how to fishtail, check out my video here. Make sure to pancake the braid as you go along, by gently tugging on the edges of the braid.
6.) Add some hairspray if desired, and feel free to bobby pin anything that isn’t sitting the way you want it to. Annd you’re done!

Hairstyle No. 2: Dutch Rope Braid Half-Up
I love this hairstyle because it’s just that little bit more unique than some half-up styles, and it gets the hair out of your face at the same time!
A huge thanks to my friend for being my model for this hairstyle!
Items needed: 1 small rubber hair tie, (Optional: bobby pins) As previously mentioned, a mirror is super helpful for DIY style so you can see what you’re doing. 😉
Time: 3-5 minutes
Difficulty: Medium
Step-by-step instructions:
1.) Start by sectioning off the top half of your hair..
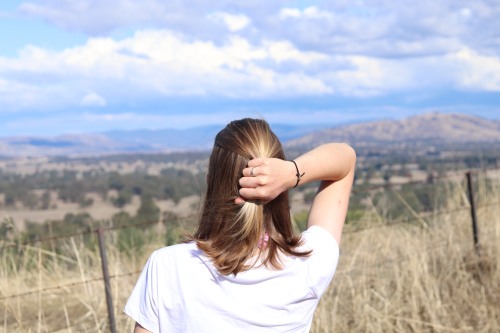
2.) Next, evenly split your section into two and cross over each other to start your rope twist..

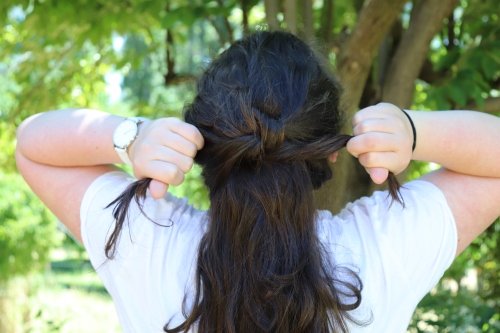
3.) To rope braid, take the two sections and twist the right section towards the left side of your head and then twist under the left (basically, twist one section in one direction and then cross that section over in the opposite direction.) See a similar concept in this tutorial on my blog (minus adding the hair in).
Repeat for one or two stitches down, then stop and add hair from both sides of your head into the sections you’re twisting. (hair from your left side into your left sections, hair from your right into your right section.) Then continue with your rope twist, adding in more hair from both sides each time before you twist again.
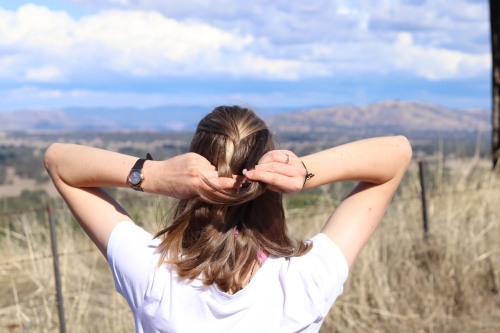
4.) Once you’ve reached about ear height (or your desired height for your half-up) stop adding in hair and twist down a few more times..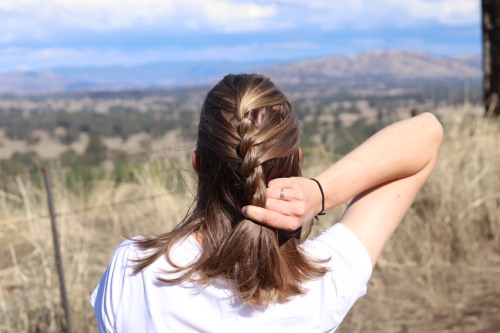
5.) Then, while holding the twist in one hand, and go back with your free hand and gently tug on the edges of the twist to accentuate the twist..
6.) Secure the twist with an elastic right below where you stopped adding in hair. (Optional: wrap some hair around the hair tie to cover it, or add a small hair accessory as desired.)
And you’re done! Here are some more pictures of the final look:
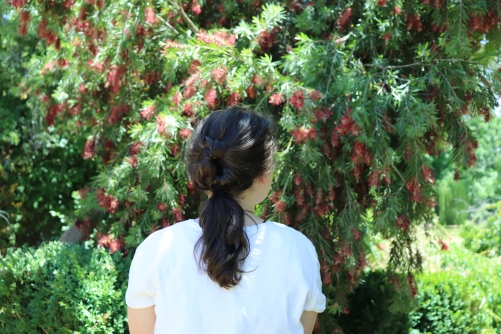
Hairstyle No. 3: Double Knot Messy Ponytail
This hairstyle is super quick and relatively easy. It’s perfect to get your hair out of your face on a hot day, while still looking cute. (Thanks to my sister for modelling this hairstyle for me. 😉 )

Items needed: 1 hair tie, a couple of bobby pins, & (hairspray is optional.) Again, using a mirror is super helpful if you doing the style on yourself to see what you’re doing. 😉
Time: 3-6 minutes
Difficulty: easy-medium
Step-by-Step Instructions:
1.) Begin with you hair down and pulled straight back.

2.) Next pick up a medium sized section of hair on either side of the head…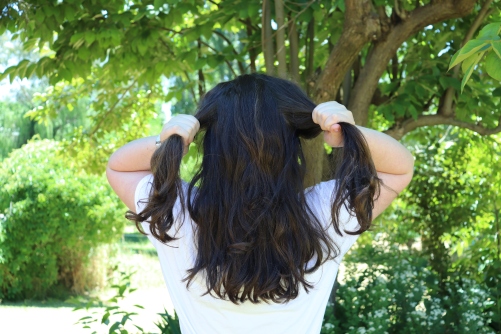
3.) Now tie the two sections of hair into a knot at the back of your head (think of how you would tie a knot if your were tying your shoelaces. 😉 )

4.) This is where it gets a little tricky. While still holding the ends of the knot you just tied, pick up some more hair on either side of your head below the section your just tied and repeat step 3, adding in the ends from the previous knot.
5.) Now I know this is called a double knot hairstyle, bu to finish off the hairstyle (depending on your length of hair) we’re actually going to do one more knot repeating steps 3-4. Then gather all remaining hair an secure tightly at the base of the neck with a hair tie.

6.) All you need to do now is pin the knots to your liking, and you’re done! (For a more polished look, wrap some hair around the hair tie to cover it, and maybe even some wand curls to the ponytail. 😉 )

Annd you’re done!
Well that’s all the hairstyles I have for today. I hope you enjoyed this post, please let me know if you have any questions or comments down below! 🙂
For more tutorials like this check out my website at www.setongirlshairstyles.com
A big thank you to the girls here at Life Without a Latte for letting me share these tutorials today!
We can’t wait to learn these on ourselves!! (You’re crazy good at hair, thanks so much for sharing, Clare!!)
LAST DAY to enter the giveaway!

Which hairstyle was your favorite?

why do we sign off our joint posts with “PerAnna”? find out here!
Yo, did you enjoy this post? Pin it!


Cuteeeee!!!!
LikeLiked by 2 people
Fun post!! ❤
~Esther
LikeLiked by 2 people
Nice hairstyles!! I especially like the last one, very cute! 🙂
LikeLiked by 2 people
Thank you!
LikeLike
These hairstyles are so cute! I am going to have to try them on my hair. 🙂
LikeLiked by 2 people
Thanks Heaven, so happy you like them!
LikeLiked by 2 people
Wow lovely! I think I like the last one the most! Thanks so much Clare for sharing! 😊
LikeLiked by 2 people
Thank you Hope! It is a fun hairstyle, isn’t it? (: You’re welcome!
LikeLiked by 2 people
These are so pretty!
LikeLiked by 2 people
So cute!!! ❤
LikeLiked by 2 people
I love these! Thanks for sharing :))
LikeLiked by 2 people
Thanks Isabel, glad you like them! ❤
LikeLiked by 2 people
I don’t know if I am too old for those hair styles but they are super cute!
LikeLiked by 2 people
Aw, well I honestly think the last two hairstyles would be great for any age-I hope you give them a go! (: & Thank you, so happy you like them! ❤
LikeLiked by 1 person
Such an awesome and adorable post! Love those hairstyles, they’re soooo cute!!
LikeLiked by 2 people
Thanks so much!! <33
LikeLiked by 1 person
You are very welcome! 💕
LikeLiked by 1 person
These hairstyles are so cute and very unique! I haven’t seen any of these before, which is great. 🙂
LikeLiked by 1 person
Thank you! So happy to be able to share some new hairstyles with you! ❤
LikeLiked by 2 people
These hairstyles are soo cute! Thanks Clare for this wonderful guest post!
LikeLiked by 1 person
❤ Thanks Lily! You're so welcome, I love sharing new styles with people! 😉
LikeLiked by 1 person
Good post
LikeLiked by 1 person